
Surprising fact: more than 80% of technical hiring managers value hands-on practice over certificates when judging entry-level candidates for security roles.
This guide gives a safe, repeatable way to build practical skills and show real experience to employers without touching production systems.
You’ll start with a modest baseline: a modern multi-core CPU, 16GB of RAM, and an SSD with 256GB free. Add virtualization (VirtualBox, VMware, or Hyper‑V) and ISOs for Windows and Linux. Optional network segmentation isolates experiments from daily devices.
We map each step to real tasks professionals do. You’ll deploy a gateway/firewall, management and target virtual machines, and common tools like Wireshark and Metasploit. This lets you test offensive and defensive techniques while keeping mistakes contained.
For a compact, practical walkthrough and hardware checklist, see this beginner’s cyber home lab setup.
Key Takeaways
- Hands-on practice beats theory for building real skills.
- Start small: aim for 16GB RAM, SSD, and virtualization software.
- Isolate the learning environment to protect daily systems.
- Install tools that cover both attack and defense perspectives.
- Document commands and snapshots to speed your learning.
- Follow repeatable steps so you can rebuild and expand safely.
Why a Home Lab Matters and What You’ll Build
Create an isolated environment to test tools, simulate incidents, and learn fast.
Hands-on practice gives you a judgment-free sandbox to try techniques without touching production systems. You can run attacker and victim machines, break things, and then fix them. That cycle turns mistakes into lasting skills and credible experience.
Hands-on benefits: safe experimentation, skill growth, and career impact
Safe experimentation helps you learn SIEM tuning, IDS alerts, and forensic workflows. You gain skills that hiring managers value: troubleshooting, detection, and documented results.
“Practical experience often proves more persuasive than certificates when hiring entry-level engineers.”
Preview of your environment: gateway, VMs, SIEM, and a cyber range
Your starter environment typically includes a gateway/firewall (pfSense), management VMs like Kali Linux, an Active Directory domain, and a defensive stack such as Security Onion or Wazuh with Splunk for analytics.

- Use vulnerable targets (Metasploitable) to validate detections.
- Snapshot and rollback to iterate quickly.
- Expand later with DFIR workstations or cloud integrations.
- Complement practice with platforms like structured challenges.
| Component | Role | Example |
|---|---|---|
| Gateway / Firewall | Network segregation and routing | pfSense |
| Offensive VM | Assessment and attack tools | Kali Linux |
| Defensive Stack | Monitoring and SIEM | Security Onion / Wazuh + Splunk |
| Targets | Safe vulnerable systems | Metasploitable |
Requirements and Planning for Your cyber home lab setup
What do you need to run a safe, flexible hands-on environment? Aim for a 64‑bit, multi‑threaded CPU with VT‑x or AMD‑V, 16GB RAM, and an SSD with at least 250–256GB free. Confirm virtualization support early so you avoid mid-build stalls.

Hardware essentials
Choose hardware that can multitask: a modern 64‑bit cpu with virtualization enabled, 16GB ram, and a 250GB+ storage SSD. More cores and NVMe speeds help when running multiple VMs.
Smart storage and drive strategy
Point your hypervisor’s default VM folder to a secondary drive. This keeps the OS disk healthy and leaves room for snapshots and growth.
Enable virtualization and confirm on Windows
On Windows, open Task Manager > Performance to check virtualization. If it’s off, enable VT‑x/AMD‑V in BIOS/UEFI before installing any hypervisor.
Virtualization platforms, ISOs, and network safety
Pick VirtualBox, VMware, or Hyper‑V and download operating system ISOs for Linux and Windows. Design network access with NAT, VLANs, and a pfSense segment to isolate experiments from your main network.
“Document your concepts—NAT, DHCP, routing, and firewall rules—so your design stays predictable and safe.”
- Resources: start small and scale as your system tolerates.
- Dependencies: install VC++ 2019 if VirtualBox asks, then add the Extension Pack.
Installing and Configuring Your Virtualization Environment
Start by choosing software that keeps your test systems isolated and easy to manage. Pick a hypervisor that fits your goals: VirtualBox is free and flexible, VMware often has stronger device support, and Hyper‑V integrates tightly with Windows.
Download and install VirtualBox (7.x) and the Extension Pack. If the installer reports a problem, install the Microsoft Visual C++ 2019 Redistributable and rerun the installer as an administrative step.

Key configuration and performance steps
- Change File > Preferences > Default Machine Folder to a secondary drive so VM disks use the faster storage and keep the OS disk free.
- Create initial vms with modest resources (2 vCPU, 2–4GB RAM, thin‑provisioned SSD). Expand only when systems show constraints.
- Install Guest Additions for better graphics, clipboard sharing, and folder access. If you hit a black screen, tweak video memory, disable 3D temporarily, or switch display controllers.
- Tune settings like processors, paravirtualization interface, and NIC type for steady performance gains.
- After installing OS and core tools, take a baseline snapshot labelled clearly (e.g., “Clean OS”) to enable quick rollback as you experiment.
| Task | Why it matters | Quick action |
|---|---|---|
| Install VirtualBox + Extension Pack | Host support and USB/VM features | Run installer; add VC++ if error appears |
| Default Machine Folder | Preserves OS disk I/O and space | Set to secondary drive before creating VMs |
| Baseline snapshot | Fast rollback and repeatable tests | Snapshot after updates and tools installed |
“Treat snapshots like save points—label them and keep chains short to avoid disk bloat.”
Core Lab Components and Security Tools to Deploy
What core pieces should you deploy first to make a functional, testable environment?
Build a clear inventory of core components before you power on any virtual machines. That keeps traffic visible and prevents accidental exposure.
pfSense as gateway and firewall: routing, DHCP, and rules
pfSense sits at the edge to enforce routing, VLANs, and DHCP. Place it so it controls both north‑south and east‑west flows.
Use explicit firewall rules to test segmentation and to log traffic for later analysis.
Kali Linux as management and offensive tooling VM
Kali Linux is your daily toolset VM for assessments and admin tasks. Keep it on a management VLAN and update tools regularly.
Active Directory mini‑environment: Windows Server DC and clients
Run one Windows Server domain controller and two Windows clients to model authentication, Group Policy, and lateral movement.
This mirrors basic enterprise identity and gives realistic events for the monitoring stack.
Defensive stack: Security Onion or Wazuh plus Splunk for SIEM
Deploy Security Onion or Wazuh to collect logs, then forward them to Splunk for dashboards and alerts.
Configure meaningful detection rules and validate alerts against known test cases.
Range targets: vulnerable machines like Metasploitable
Add Metasploitable and other intentionally vulnerable machines to test exploits and validate detection tuning.
Thin‑provision disks and archive large PCAPs to manage storage and performance.
- Label segments (Mgmt, Server, Range) so scenarios are deterministic.
- Tune vms so core systems run without starving others; record baseline performance.
- Track flows from pfSense to monitoring tools and into Splunk for analyst workflows.
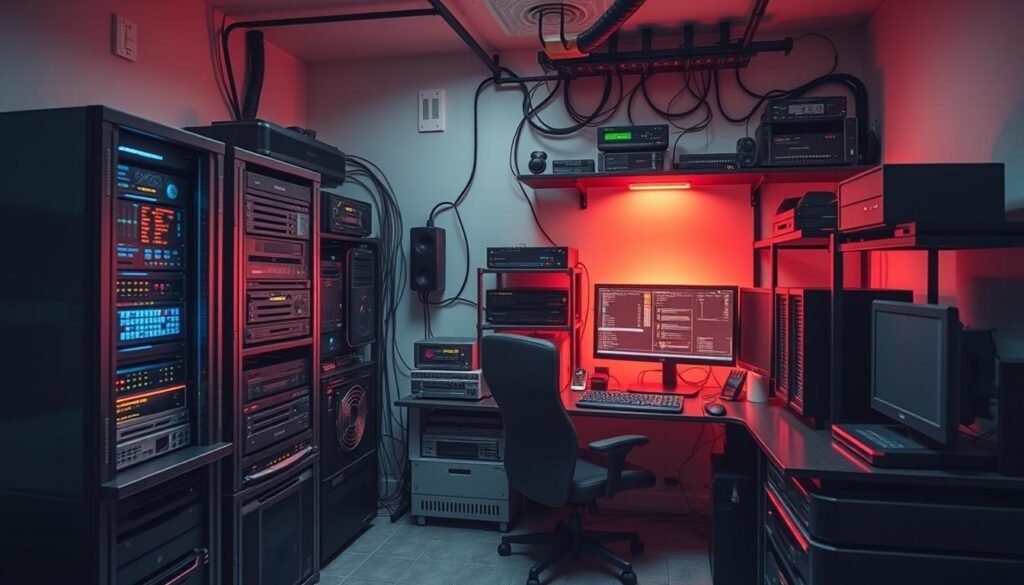
| Component | Purpose | Example |
|---|---|---|
| Gateway / Firewall | Network segmentation, DHCP, routing, logging | pfSense |
| Offensive VM | Assessment and admin tooling | Kali Linux |
| Identity Systems | Authentication, Group Policy, lateral movement testing | Windows Server + Windows clients |
| Defensive Stack | Log collection, detection, analyst dashboards | Security Onion / Wazuh → Splunk |
| Targets | Vulnerable systems for testing and validation | Metasploitable |
Practice Scenarios, Monitoring, and Documentation Workflow
Define clear boundaries, then enumerate the network with Nmap before deeper testing. This lets you map hosts and services safely and creates a repeatable record for each exercise.
Vulnerability discovery: start with Nmap for host and port discovery, then run OpenVAS against safe targets like Metasploitable. Focus on prioritized findings so your next step is learning, not indiscriminate exploitation.

How do I simulate attacks and phishing safely?
Use GoPhish to run ethical phishing campaigns in a controlled environment. Track click‑throughs and captured creds, then test mitigations such as blocking at the gateway or applying user training.
How do I validate detection and respond?
Generate known events to validate detection. Trigger alerts in Snort or Suricata, then inspect packet captures in Wireshark to see why the rule fired. Route logs into Security Onion or Wazuh and forward selected feeds to Splunk for correlation and dashboards.
What documentation should I keep?
Keep a short runbook per scenario with the tools, commands, expected outputs, and observed results. Capture screenshots, error notes, and a concise after‑action summary describing what worked and what you’ll change next time.
- Step process: scope → discover → assess → simulate → validate → document.
- Track: which vms and systems were used so you can rebuild tests fast.
- Practice: repeat core workflows to build skills and measurable experience.
“Good documentation turns a single exercise into lasting experience.”
Conclusion
Treat this as a steady, measurable program: confirm virtualization, isolate networks, deploy core systems, document every step, and iterate.
Treat this project as a series of small experiments that produce measurable results. Start by confirming virtualization on your CPU, then install a stable hypervisor and the Extension Pack.
Isolate the network with pfSense and add core VMs such as Kali Linux, an AD mini‑domain, a SIEM stack, and vulnerable targets. Track commands, errors, screenshots, and a short post for each process.
Right‑size hardware: balance CPU, RAM, and storage on a secondary drive to preserve performance and resources. Expand slowly, calibrate scope to avoid burnout, and use platforms like building a home lab guide to complement hands‑on work.
Keep practicing. Small, consistent wins compound into real cybersecurity skill and confidence.
FAQ
What hardware do I need to build my first home learning environment?
Aim for a modern CPU with virtualization support (Intel VT-x or AMD-V), at least 16 GB of RAM, and an SSD for fast VM performance. Add a secondary hard drive or NVMe for long-term VM storage and ISOs. A spare gigabit-capable network interface helps when you want to separate management and lab traffic. If you plan many concurrent VMs, increase RAM and CPU cores.
Which virtualization platform should I choose: VirtualBox, VMware Player, or Hyper-V?
Each has pros and cons. VirtualBox is cross-platform and beginner-friendly. VMware Workstation Player often gives better performance and guest compatibility. Hyper-V is built into Windows Pro/Enterprise and integrates well with Windows Server and Active Directory labs. Pick the one that fits your host OS and hardware; you can run multiple platforms if your machine supports nested virtualization.
How should I design the network to keep experiments safe from my main network?
Use NAT for isolation or create VLANs and a routed gateway like pfSense to segment traffic. Place vulnerable targets on a separate virtual network or physical NIC. Implement firewall rules and block outbound internet access from exposed VMs unless explicitly needed. Treat the lab as a hostile zone and avoid bridging lab VMs directly to your home LAN.
What are the essential virtual machines and tools to deploy first?
Start with a gateway/firewall VM (pfSense), one attacker VM (Kali Linux), a Windows Server Domain Controller for Active Directory practice, and one or two client VMs (Windows 10/11, Ubuntu). Add a SIEM or host-based detection VM like Wazuh or Security Onion for monitoring. Include a deliberately vulnerable target such as Metasploitable for safe exploitation practice.
How much RAM and CPU should I allocate to each VM?
Allocate based on role: domain controllers and small Linux tools can run with 2–4 GB RAM; Windows 10/11 clients need 4–8 GB for realistic performance; Kali can work with 2–4 GB. Reserve enough host resources so the host OS stays responsive—don’t allocate all RAM to VMs. Start conservative and increase resources when needed.
Should I enable snapshots and what’s a good rollback strategy?
Yes—use snapshots or VM checkpoints as recovery points before risky actions. Keep a clean baseline snapshot of each VM (unpatched or configured as needed). After experiments, revert to baseline to restore a known state. Maintain snapshots sparingly: many large snapshots consume storage and can slow VMs.
How do I enable virtualization in BIOS/UEFI and confirm it on Windows?
Reboot and enter BIOS/UEFI (keys like F2, Del, or Esc) and enable Intel VT-x or AMD-V and Intel VT-d/AMD IOMMU if available. In Windows, check Task Manager > Performance tab for “Virtualization: Enabled.” You can also run systeminfo.exe and look for virtualization support entries.
How can I keep my lab from leaking sensitive data or attacking real systems?
Isolate lab networks (NAT, VLANs, or a dedicated physical NIC), block outbound internet from exploitable VMs, and avoid scanning or attacking systems you don’t own. Use hosts files or internal DNS to limit name resolution. Keep backups and snapshots, and never connect compromised VMs to production services.
Which monitoring and detection tools should I add for learning detection and response?
Deploy a SIEM like Splunk (free tier) or Wazuh for log collection. Add network IDS/IPS tools such as Suricata or Snort, and packet capture with Wireshark. Correlate alerts with host logs and experiment with detection rules to see how attacks surface and how to tune signatures.
How do I manage storage for many VM disks and ISOs effectively?
Use a secondary SSD or HDD dedicated to VM disks and ISO images. Set a default VM storage folder in your virtualization platform. Use thin-provisioned disks where supported to save space, and periodically clean snapshots and unused ISOs. Consider external USB 3.1 or NAS for archival storage.
Can I practice Active Directory attacks safely in this environment?
Yes—create a small isolated AD domain with a Windows Server acting as domain controller and a few client machines. Use this isolated domain to practice credential harvesting, Kerberos attacks, and group policy scenarios. Keep the domain off networks you don’t control and restore from snapshots after offensive testing.
What’s a good workflow for documenting experiments and lessons learned?
Keep a consistent notebook—record objectives, commands run, screenshots, and outcomes. Use markdown files, a personal wiki, or a tool like Obsidian or Notion. Tag entries by technique (reconnaissance, exploitation, detection) and link to snapshots so you can reproduce results and share findings responsibly.
Are there legal or ethical considerations I should know before running attacks?
Absolutely. Only run offensive tools against systems you own or have explicit permission to test. Follow local laws and ethical guidelines. If you collaborate or share vulnerable images, ensure they’re clearly marked and kept in isolated networks to prevent accidental spread.
What common performance tweaks improve VM responsiveness?
Install Guest Additions or VMware Tools for better drivers and shared folders. Enable paravirtualized drivers (virtio) where available. Allocate enough RAM and CPU, use SSD storage, and disable unnecessary services in guest OSs. Adjust video and network adapter settings for better throughput.
How can I safely learn phishing and social-engineering techniques in my practice area?
Use dedicated phishing platforms like GoPhish in an isolated test domain with consenting participants or throwaway accounts. Simulate campaigns against lab-controlled users only. Focus on learning detection, user awareness, and mitigation—never use real user data or trick uninformed people.
