
Surprising fact: studies show removable drives account for a large share of local infections, letting harmful code run the moment a device connects.
This guide explains how a single inserted USB or disk can activate persistent code on a Windows operating system and keep it running across reboots.
You will get a plain-language map of the main persistence paths: Windows services, registry run keys, scheduled tasks, drivers, and startup folders. We show how attackers use legitimate tools like services.exe, PowerShell, and WMI to hide.
Expect clear steps to detect and remove a malicious file with trusted tools such as Microsoft Sysinternals Autoruns, Task Manager, and Process Hacker. We also cover defenses that protect your data and users: least privilege, patching, endpoint protection, and tested backups.
Key Takeaways
- Removable media can auto-start code that survives reboot and hides in system settings.
- Scan auto-start locations and scheduled tasks with trusted tools to find suspicious entries.
- Harden your operating system: disable AutoPlay, apply least privilege, and patch promptly.
- Use endpoint protection, firewall/IPS, and SIEM correlation to detect anomalies.
- Maintain tested backups and an incident response playbook for quick recovery.
Why removable media still matters: understanding modern risks and the autorun malware threat
Removable media still introduces real risk because malicious code often executes right when a device is read and then persists to survive reboots. Disable AutoRun/AutoPlay, train users, and scan anything untrusted before it touches a machine.
Even today, a stray USB or bundled disk can launch a program the moment it’s read and seed persistent code on a machine. Attackers exploit Windows AutoPlay settings and social engineering to get users to run installers or open files.
Once executed, the payload often installs services or scheduled tasks so it restarts at boot. Tools like Autoruns help surface these entries, and network logs can show unusual outbound connections when the sample “phones home.”
Good defenses mix technology and behavior. Enforce media-use policies, enable endpoint scanning, and filter email and web attachments to block initial delivery. Train users to question unknown devices and report unexpected behavior.

- Practical steps: block AutoPlay, scan media on a sandbox, verify hashes, and monitor services and tasks for new entries.
- Treat unknown media as potentially hostile and test installers in an isolated environment before deploying to company machines.
How malware spreads via USB drives and disks
Inserted media rarely runs code silently on modern Windows, but user prompts and bundled installers still hand attackers a way in. Once executed, the payload often writes registry run keys, scheduled tasks, or services to persist across startup and login.
From autorun.inf to persistence: what actually triggers on insert
Old autorun.inf tricks lost effectiveness, but AutoPlay prompts or installer menus keep the vector alive. Users click a friendly-looking file or launcher and the execution chain begins.
Common persistence locations include the registry Run keys (for example HKLM\Software\Microsoft\Windows\CurrentVersion\Run), scheduled tasks, and services that start at boot. Use autoruns tools to inspect new entries and suspect file paths.
Social engineering and “free” media: luring users to execute files
Attackers rely on filenames, icons, and fake previews to convince users. A familiar icon and a clean name reduce suspicion. Watch for files placed in temp folders or with random names.
Bundled software and rogue media: why supply sources matter
Unverified USBs or bundled installers can add background software and modify settings. Restrict unknown media and require signed software. When testing, scan and compare changes and use tools to validate publishers.

| Persistence Location | How it is Used | Red Flags |
|---|---|---|
| Registry Run keys | Auto-start at login via HKLM/HKCU entries | Odd file path, missing publisher signature |
| Scheduled Tasks | Timed or login-triggered execution | Unusual triggers, random task names |
| Windows Services | Runs with system privileges at boot | New services with odd binary path |
For a step-by-step cleanup guide, see remove persistent malware.
Inside Windows autostarts: services, registry, tasks, and other ASEPs malware abuses
Most Windows persistence hides in plain sight across ASEPs—services, registry run keys, tasks, drivers, and more. Map these locations, validate image paths and signatures, and flag anomalous entries to break the auto-start chain.
Attackers commonly plant persistence across multiple auto-start areas so one reboot won’t remove their foothold.
Windows services and auto-start configuration for persistence
Services are a primary vector: creating a service under HKLM\SYSTEM\CurrentControlSet\Services and setting Start=Auto makes an executable run at boot.
Tools like sc.exe or PowerShell New-Service automate this. Inspect service image paths and publisher signatures for unexpected files or temp locations.
Registry run keys, startup folders, and Winlogon hooks
Run/RunOnce keys in HKLM and HKCU and shortcuts in the startup folder trigger programs at user login.
Winlogon hooks or Userinit changes run early in the session. Watch for blank publishers, odd names, or paths that don’t match legitimate windows behavior.
Scheduled Tasks, WMI, and image hijacks
Scheduled Tasks and WMI event consumers can respawn applications on triggers. Review XML task definitions for hidden commands or unfamiliar working directories.
Image hijacks redirect a common process to a malicious binary; Autoruns highlights these under the Image Hijacks view and makes review faster. For technique details see services and autostart persistence.
Drivers, LSA providers, Known DLLs, and Boot Execute paths
Kernel drivers and Known DLLs (for example replacements of kernel32.dll or ntdll.dll) create stealthy load paths. Verify file hashes against a clean baseline.
LSA providers and Boot Execute (Session Manager) entries load very early and demand immediate analysis if unfamiliar.
Advice: perform targeted analysis—confirm path legitimacy, inspect the process image, and correlate entries across ASEPs to reveal coordinated persistence.
- Services: check Start type and image path.
- Registry: scan Run keys and Winlogon values.
- Tasks/WMI: export task XML and search for hidden actions.
- Drivers/ DLLs: validate signatures and compare hashes.
Using Sysinternals Autoruns to surface hidden startup entries
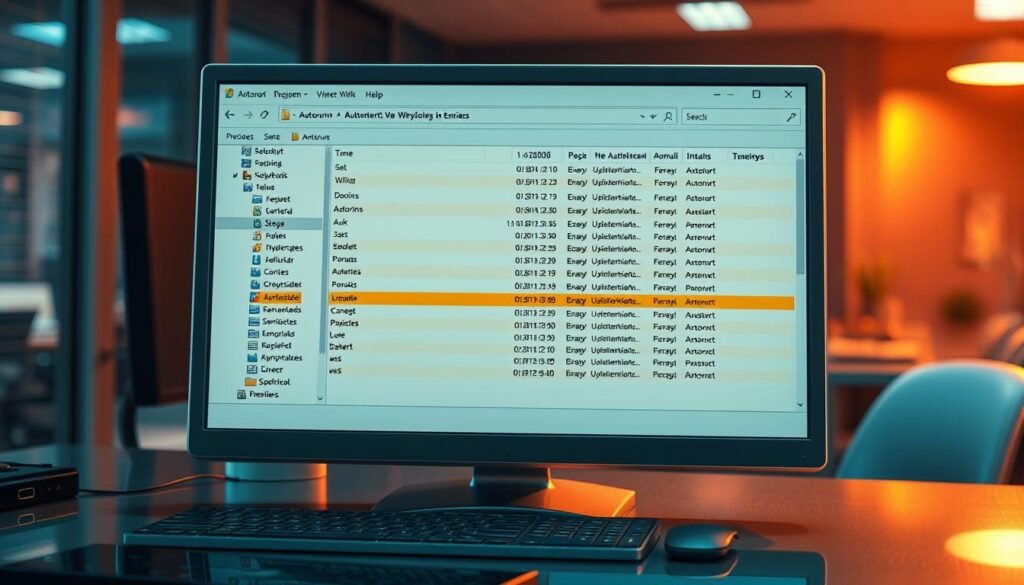
Autoruns gives a complete view of system and user autostarts, making investigation faster. Run it from the Live website or the Sysinternals share to avoid leaving tools on disk and reduce tampering risk.
Safe acquisition:
How do you acquire and verify Autoruns safely?
Start Autoruns from \\live.sysinternals.com\files\ or download from the official website. Run it as an administrator to gain full access to all hives and user profiles.
Use the Verify Image option to check digital signatures before you trust a file. That helps separate legitimate windows software from suspicious binaries.
Which tabs give the highest signal?
Focus on Logon, Services, Scheduled Tasks, Drivers, and Explorer. These tabs capture most persistence paths and reveal odd paths and unsigned files quickly.
What options speed detection and validation?
Turn on “Hide Windows entries” to cut noise, then enable the VirusTotal option to submit hashes and view detection counts. Export .arn results and compare scans to a clean baseline to spot new entries after a company change or incident.
When should you change user context or run offline analysis?
Switch user context to inspect a specific account when activity is limited to that user. Use Offline Analysis against a mounted Windows directory for stubborn cases where live processes hide entries.
Quick tip: Use Autoruns from the Live Sysinternals share to avoid tampering. Hide Windows entries, enable VirusTotal lookups, verify signatures, and review critical tabs to expose stealthy startup entries quickly.
Hands-on detection workflow: spotting suspicious processes and files
Start with a live view of what the system is running now. Inspect processes, confirm file paths, compute hashes, and verify reputation with multi-engine results before you act.
Begin by listing active processes and services to build a clear picture of what the machine is running now.
Red flags to watch for: unsigned files, blank descriptions, random names, mismatched icons, or binaries executing from temp folders and user-writable folders.
Open Task Manager or Process Hacker. Look for high CPU or disk use and processes with no publisher. In Process Hacker, right-click a suspicious process and choose Open File Location to reveal its real path.

Compute a SHA-256 hash with a trusted hashing tool (for example with PeStudio or built-in certutil). Submit the hash to VirusTotal and review engine results and vendor classifications.
- Cross-check persistence: match process image paths with Run keys, Scheduled Tasks, or Services pointing to the same path or name.
- Document findings: collect screenshots and exported results when machine visibility is limited.
- Corroborate telemetry: use antivirus and endpoint protection logs to add context to your analysis.
Rule of thumb: terminate a confirmed malicious process before changing persistence entries so the sample cannot respawn.
Removal and cleanup: terminate, disable persistence, and delete safely
Begin cleanup by confirming the unwanted program is active, then work methodically to remove its startup hooks and files.
Confirm the running process using Task Manager or Process Hacker. Note the process name, image path, and any parent process that spawned it.
Terminate the process first to prevent immediate respawn. Next, stop related services and scheduled tasks and verify each service start type in Services manager.
What should you delete in Autoruns and how do you validate paths?
Open Autoruns, filter to hide Windows entries, and locate suspicious entries by image path. Uncheck to disable or delete entries that point to the same program path you noted.
Validate each path before removal. A wrong deletion can break legitimate system components. Confirm the file location, publisher signature, and file hash when possible.
Quick rule: Kill the process first, then disable how it auto-starts, and finally remove the files. Reboot and rescan to confirm the system is clean against a known-good baseline.
- Stop: terminate process via Task Manager or Process Hacker.
- Disable: stop services and tasks; check service/service startup settings.
- Remove: delete persistence entries in Autoruns and then remove leftover files and DLLs once no locks remain.
- Verify: reboot, rescan with Autoruns and AV, and compare results to a clean .arn baseline.
| Step | Action | Validation |
|---|---|---|
| Terminate process | Use Task Manager or Process Hacker | Process no longer running; image path recorded |
| Stop services/tasks | Change startup to Disabled; stop service or delete task | Service state = Stopped; task triggers removed |
| Remove startup entries | Uncheck or delete entries in Autoruns | Entry absent after reboot and rescan |
| Clean files | Delete binaries, temp files, supporting DLLs | Files removed; no locked handles |
If entries return, investigate hidden tasks, WMI consumers, or secondary droppers. For stubborn cases, perform offline analysis on a mounted image to avoid in-memory respawns.
Prevention and system hardening for the United States audience
Block the vector and limit blast radius. Disable AutoRun/AutoPlay, enforce least privilege, keep the operating system patched, and layer EPP, firewall/IPS, SIEM, and tested backups to protect data and users.
Reduce risk by changing default operating system behaviors and limiting what users can run from external drives.
Disable AutoRun/AutoPlay for USB and optical media
Enforce Group Policy to stop automatic execution across Windows endpoints. Set the policy for removable drives and optical media or apply the registry keys centrally for management tools.
Make the change via GPO and verify with a baseline scan so devices no longer launch content without user intent.
Apply least privilege, patch management, and secure settings
Limit local admin rights and tighten file and folder access. Follow the Principle of Least Privilege (PoLP) so unknown code cannot gain elevated access easily.
Keep OS and business software up to date. Disable unused services, close open ports, and require signed drivers and approved software.
Layer endpoint protection, network controls, SIEM, and backups
Deploy advanced endpoint protection and antivirus that combine signature and behavior detection. Pair EPP with firewall/IPS to block post-execution callbacks.
Feed logs into a Security Information and Event Management (SIEM) system to detect unusual auto-start changes, device insert events, or odd network flows.
- Quick wins: block AutoPlay with GPO, reduce admin accounts, and schedule regular patching.
- Resilience: keep offline or immutable backups and test restores to protect critical data and enable recovery.
Note: combine policy, tooling, and user training. Technology works best when users know not to run unknown files from external drives.
For administrators: incident response, analysis, and user training
Develop and drill an IR plan that prioritizes containment and evidence preservation. Baseline with Autoruns, audit logs for startup changes, and train users to report issues early.
Responders need a tested playbook so they can contain an incident fast and preserve evidence. Define clear roles and escalation paths so each person knows who owns each task.
What are the containment and evidence steps?
Contain: isolate affected hosts from the network and block outbound connections to stop lateral movement.
Preserve: collect volatile information (running processes, network sessions, task lists) and capture memory if needed.
Coordinate: inform legal and leadership, and centralize communications to the company incident channel.
How do you baseline, detect, and analyze changes?
Establish a known-good autoruns baseline of ASEPs and save exported results for comparison. Use the Sysinternals Live website to acquire tools to avoid contaminating a response.
Forward Windows event logs and endpoint telemetry to a SIEM. Alert on new services, scheduled tasks, or registry modifications in startup locations.
Tip: keep a catalog of trusted program names, publishers, and expected locations to speed triage.
| Action | Why it matters | Who owns it |
|---|---|---|
| Isolate host | Stops spread and limits data loss | Network admin / IR lead |
| Capture autoruns baseline | Detects new startup entries after an event | Forensics / IT team |
| Forward logs to SIEM | Centralizes detection and correlation | Security operations |
| User reporting program | Shortens time-to-detect from users | HR / Training / Security |
Document each incident and share results in company playbooks. Run regular drills, update detection rules, and run awareness campaigns so users spot suspicious devices and installers early.
Conclusion
Close each investigation with a repeatable sequence: detect, validate, stop, remove, and verify.
Autorun-based risks rely on persistence and user trust. Use Autoruns and core tools to surface startup entries, confirm findings with signatures and VirusTotal, then remove footholds and harden the system.
Combine disciplined incident response, layered endpoint protection and antivirus, SIEM logging, and tested backups to limit impact if a virus slips past defenses.
Keep a clean baseline, treat unknown media cautiously, and get trusted utilities from the Sysinternals Live website for safe acquisition and reliable analysis.
Final thought: clear process, good tooling, and routine training build lasting resilience for your Windows applications, services, and overall security posture against removable-media borne malware.
