Fact: misconfigured devices and open services cause over 40% of small-site breaches, making careful design essential even for personal projects.
This guide shows a step-by-step path to a defensible test environment that applies workplace-grade practices at a practical scale. You’ll learn how enterprise patterns — least privilege, infrastructure as code (IaC), and site reliability engineering (SRE) habits — translate to a simple, repeatable setup.
Start small, iterate safely. We map goals for privacy, security, and remote access into a working design you can run today. Expect to use modern gear like a Unifi Dream Machine SE/Pro, PoE switches, and a Synology NAS for reliable storage and backups.
We also cover VLAN segmentation, scoped services, and identity-aware access to avoid broad VPN exposure. Over time, you’ll build testing practices that protect data, reduce blast radius, and keep daily convenience intact.
Key Takeaways
- Start small: build in stages and apply enterprise practices at home.
- Define goals: privacy, security, and remote access drive design choices.
- Segment and scope: VLANs and scoped services reduce risk without breaking use.
- Use proven gear: Unifi, Synology, and Proxmox keep cost and complexity predictable.
- Protect data: RAID/ZFS, snapshots, and offsite backups prevent experiments from becoming disasters.
- Repeatable checklist: finish with a maintenance cadence you can reuse as you grow.
Define goals, scope, and risk tolerance for your homelab
Define who and what you protect, and pick a risk level you can live with.Make decisions that limit exposure and save time when issues occur. Test changes in the lab before touching your production home systems.
Define what matters most—privacy, remote access, and manageable risk—before you buy gear.
Privacy, security, and remote access objectives
Write down what privacy means to you. Note which data is sensitive and which things can be public. This helps you choose fewer cloud services and local-only cameras if needed.
Translate security goals into capabilities you control. Segment untrusted devices, limit east‑west traffic, and avoid blanket “allow” defaults. If you’ve managed active directory at work, apply the same discipline here.

Start small, iterate safely: lab-first, home-second
Start with a minimal viable design and test it. Validate changes in the lab, then push them to your home setup. Define acceptable downtime and catalog budget, space, heat, and power constraints.
| Goal | Scope | Risk tolerance |
|---|---|---|
| Privacy | Local-only cameras, minimal cloud | Low — no data leakage |
| Security | Segment IoT and guest VLANs | Medium — monitored, auditable |
| Remote access | Single vetted method, least privilege | Low — no broad VPN exposure |
Revisit goals every quarter. Small, steady adjustments keep controls relevant without breaking daily routines.
Plan your architecture: segmentation-first network design
Design the architecture around clear zones and enforce rules at the edge. Choose a router/firewall that supports VLANs, ACLs, IDS/IPS and plan wired backhaul where possible. Keep diagrams and configs versioned so changes are traceable.
Plan the core components first. At minimum you want a router/firewall, PoE switches, Wi‑Fi APs, a couple of servers or mini‑PCs, and a NAS for storage.

Picking gear and topology
- Centerpiece: use a Unifi Dream Machine SE/Pro for adoption, IPS throughput, and unified management.
- Size PoE switches for APs, cameras, and accessory power. Prefer 1/2.5/10G uplinks and hardwired backhaul.
- Choose APs deliberately: U6 Pro/Long Range for most setups. The U7 brings two new considerations — 2.5G PoE uplinks and fast internet to matter.
Physical layout and best practices
Use open racks (StarTech), rack PDUs, patch panels, and slim Cat‑6 patch cables for tidy runs.
“Segment early, document always.”
Reserve uplinks between core and access switches. Isolate Active Directory and DHCP zones to avoid collisions. Start small and expand when you have the time and space.
Build your VLAN strategy for isolation and control
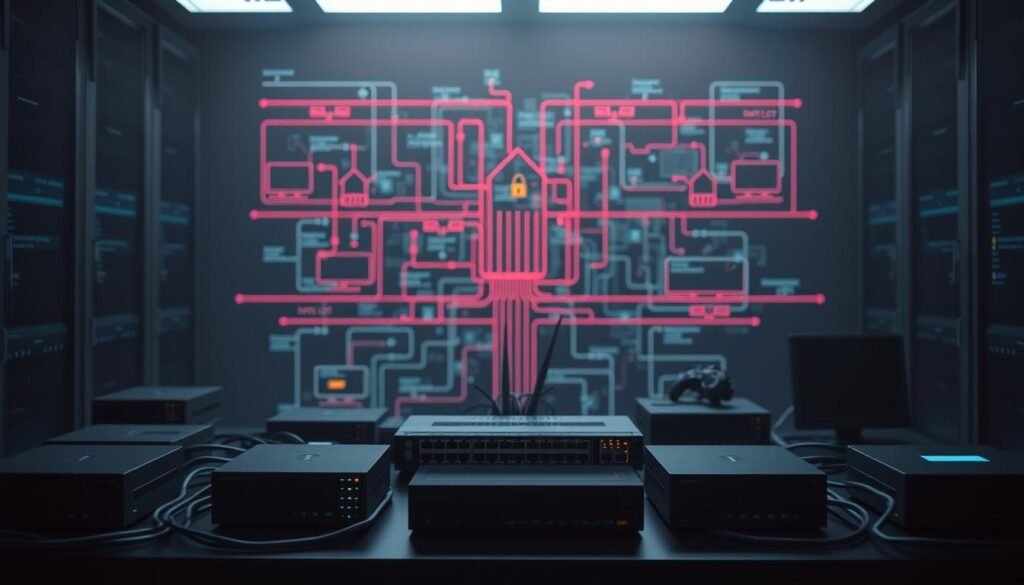
Create VLANs for Default, IoT, Guest, Secure (VPN egress), and Homelab. Enable multicast helpers (IGMP snooping, mDNS) for things like AirPlay, and plan explicit inter‑VLAN rules so traffic follows clear policy.
Map your endpoints to purpose-built VLANs so policy and troubleshooting stay simple.
What VLANs to create
- Default: keep trusted family devices here for management and casual use.
- IoT: internet-only VLAN with no lateral access to Default or Homelab.
- Guest: captive portal, device isolation, allow internet access while blocking local subnets by rule.
- Secure: route this VLAN out a VPN provider to force encrypted egress per device.
- Homelab: servers and services only; avoid a Wi‑Fi SSID and allow narrow management from Default.
Multicast and painful exceptions
Turn on IGMP snooping and mDNS to support discovery protocols such as AirPlay and Chromecast. Document every rule that permits cross‑VLAN access and prefer IP group profiles using RFC1918 addresses per VLAN.
Accept that some gear will be a bit finicky. Sonos often fails across segments; the simplest fix is placing speakers on Default to avoid brittle workarounds.
Record subnets, gateways, and DHCP scopes. Revisit allocations over time and move stray devices back to intended segments.
Firewall rules that make segmentation actually work
Build stateful allowlists: create an RFC1918 IP group, allow established/related traffic, and replace broad “allow any” with narrowly scoped rules tied to specific services and ports.
Good firewall rules turn VLANs from theory into practical, enforced boundaries.
How do you group private addresses and allow return traffic?
Create a Private Local Networks IP group with RFC1918 ranges: 192.168.0.0/16, 10.0.0.0/8, 172.16.0.0/12. Reference that group in inter‑VLAN policies instead of hardcoding subnets.
When should you use “Allow established/related” vs broad allow?
Place an Allow established/related rule above denies so return flows for permitted sessions are not blocked. On a trusted Default VLAN an Allow LAN to anywhere policy can be acceptable. Do not apply it to IoT, Guest, or Homelab segments.
“Deny by default, allow by intent.”
How do you keep services functioning without losing isolation?
Write explicit rules for DNS, Hue/Home Assistant, and management paths. Prefer destination-based rules with constrained ports and protocols. Log new rules for a short time to verify hits and then reduce noisy matches.

| Source | Destination | Ports/Proto | Action |
|---|---|---|---|
| Default VLAN | Private Local Networks | Any / TCP/UDP | Allow established/related |
| IoT VLAN | Resolver IP | 53 / UDP | Allow |
| Management Alias | NAS UI | 443 / TCP | Allow |
| Guest VLAN | Internet | 80,443 / TCP | Allow |
Group admin devices into aliases to simplify a single rule for SSH and web UIs. Review rules quarterly, remove unused entries, and collapse duplicates to keep troubleshooting fast. For blocking suspicious addresses at the OS level, see this guide on blocking suspicious IPs.
Host and service hardening fundamentals
Treat every host like production—document it, lock down SSH with keys and no root login, close unneeded ports, and keep packages current on a predictable cadence. These steps reduce risk and make troubleshooting faster when something goes wrong.
Begin with an inventory and accountability. Record each machine name, IP, MAC, operator, date, and asset ID. This list makes patch windows, audits, and ownership clear over time.

What should a hardening checklist capture?
- Identity: hostname, IP, MAC, and asset number.
- Ownership: operator and contact info with a last-updated date.
- Configuration notes: boot settings, SELinux mode, and backup targets.
How do I lock down SSH and admin access?
Enforce key-based ssh authentication and disable password logins. Disable direct root and require sudo so privilege use is auditable.
Limit source IPs to a management VLAN or jump host. Use iptables or nftables to allow only known management devices.
How do I reduce the attack surface quickly?
Enumerate listening ports with ss or netstat. Remove unnecessary services and package bloat. Block remaining ports at the host firewall.
Keep kernels and packages patched on a regular cadence and schedule maintenance windows so change doesn’t interrupt family use of the lab.
Set BIOS/UEFI passwords, consider disabling external boot, enable SELinux enforcing where possible, centralize logs, and practice restores for all critical configs.
Quick checklist: inventory, SSH keys only, no root login, close unused ports, update on schedule, enable SELinux, central logs, and backup+restore rehearsals. These simple steps buy a lot of time and make each case easier to investigate when an incident happens.
Linux security controls you should actually enable
Enable a host firewall, run SELinux in enforcing, and filter ICMP thoughtfully so diagnostics still work; apply zero‑trust—every VM and container must be treated as potentially hostile.
Treat each Linux host as a frontline defender: enable host-level controls before you expose services.

How should I build host firewalls and rules?
Use nftables or iptables with a default‑deny inbound policy. Explicitly open only the management and service port ranges you need.
Keep per‑service allow rules minimal and test each rule so you don’t accidentally permit broad ranges.
When should SELinux be permissive or enforcing?
Run SELinux in enforcing on production‑style server builds. If a workload breaks, switch to permissive briefly to collect AVC logs, fix labels or policy, then return to enforcing.
Avoid leaving SELinux disabled; it removes important controls that stop many common attacks.
What ICMP should I filter and what should I allow?
Block ICMP types used by scans and floods, but keep echo‑reply and essential error messages for diagnostics. This balances visibility and protection during troubleshooting.
- Zero‑trust inside the host: treat VMs and containers as untrusted devices.
- Central logs: stream firewall and SELinux events with hostname and VLAN context so incident review is fast and precise.
- Align defenses: mirror host rules with your network ACLs to avoid mismatches and outages.
Reassess controls over time. Stale rules and exceptions pile up in active setups. Regular audits keep your security posture practical and manageable while protecting critical data and connected devices.
Virtualization layer: Proxmox VE for VMs and containers
Standardize on Proxmox VE to run VMs and containers, trunk multiple VLANs over one NIC via bridges, and clone hardened golden images to deploy consistently and fast.
Treat the hypervisor as the control plane that enforces segmentation and repeatability. Proxmox VE is free to use, supports clustering and high availability, and delivers near‑native performance for Linux containers and virtual machines.
Create two bridges (for example, vmbr0 and vmbr1) bound to physical NICs. Give the homelab bridge a static IP and tag VLANs so traffic is placed in the right segment by design. You can trunk many VLANs over one physical interface, then map virtual NICs per guest.

Attach multiple virtual NICs to a VM or container to separate management and service traffic without extra hardware. Store templates, ISOs, and backups on an NFS share from your NAS while keeping latency‑sensitive disks on local SSDs.
- Golden images: build a patched machine with SSH keys and baseline hardening, then clone to reduce drift.
- Cloud‑init: use it for per‑VM secrets and network parameters so templates remain generic.
- Cluster and HA: group lab servers in a Proxmox cluster with quorum to keep critical services available.
Snapshot before major changes and keep Proxmox updated on a schedule to shorten rollback time.
Automate common tasks with community scripts to cut error-prone manual steps. Track resource usage over time to decide when to add RAM, CPU, or move workloads between nodes. These simple practices save time and make deployments predictable.
Storage you can trust: NAS, RAID/ZFS, and offsite backup
Use RAID or ZFS on a reliable NAS for resilience, back up critical data offsite with encryption (for example, Synology Hyper Backup), and keep local SSD for low‑latency VMs. Pick a clear role for each device so restores are fast and predictable.
Treat storage like the backbone of your setup: design for resilience and recoverability from day one.
How should you deploy a Synology NAS?
Stand up a Synology with WD Red drives for typical appliance reliability. Create shares for media, backups, and config archives.
Run only light services like Docker on the NAS. Remember the appliance has limited compute—no GPU workloads or heavy databases.
How do you protect data offsite?
Schedule Hyper Backup jobs to cloud targets: Azure Blob, AWS Glacier, or Dropbox. Enable client‑side encryption so an internet outage or single drive failure doesn’t cost you everything.
- Use NFS: attach the NAS to Proxmox for ISOs and VM backups.
- Local SSD: keep primary VM disks on local NVMe for latency‑sensitive workloads.
- TrueNAS option: pick TrueNAS if you want ZFS and DIY flexibility; size RAM and NICs accordingly.
Document restore steps and test them—protection only counts when you can recover under time pressure.
| Option | Best for | Resilience | Compute limits |
|---|---|---|---|
| Synology + WD Red | Backups, shares, light services | RAID or Synology Hybrid RAID | Appliance CPU, no GPU |
| TrueNAS (DIY) | ZFS, heavy redundancy, large arrays | ZFS with checksums, snapshots | Flexible — depends on build |
| Local NVMe | Latency‑sensitive VMs | Fast, not redundant (backup to NAS) | Host CPU/PCIe limits |
Track drive health and keep a spare on hand to cut rebuild time. Keep an inventory of where sensitive exports live—things like active directory exports and config backups should be versioned on the NAS.
Finally, be explicit about what the NAS will and won’t do: it is storage‑first, not a high‑compute servers option. Plan restores, test them, and you will save a bit of panic and a lot of time when a failure happens at home.
Remote access without exposing your lab
Prefer app‑level, identity‑aware remote access over broad VPNs; avoid port forwarding and never expose default SSH to the internet. Use a single, audited method to reach services and revoke rights centrally when people leave.
Make every remote session accountable. Require strong identity proof, multi‑factor authentication, and short session lifetimes. Treat each tool as an app, not a gateway to the whole estate.
What practical controls stop wide exposure?
- Least privilege: grant only the service or app a user needs, not blanket subnet access.
- No inbound port forwards: use brokered tunnels (jump hosts, managed zero‑trust) that authenticate and log sessions.
- SSH hygiene: replace password SSH with key‑based or short‑lived credentials tied to an identity provider.
- Central auth: revoke one token to cut all users access instead of editing many devices.
- Monitoring: alert on failed logins, odd hours, and long sessions; keep a break‑glass plan for onsite recovery.
“Deny by default; allow by purpose.”
Use Tailscale to securely reach your lab from anywhere
Create a private tailnet over WireGuard, enroll devices, and use Tailscale SSH, ACLs, subnet routers, and exit nodes to get encrypted access without opening ports. This reduces key sprawl and lets you control who reaches which service.
How do I join devices to a tailnet?
Install Tailscale clients on PCs, VMs, Raspberry Pis, and servers and sign in with your identity provider. Each node becomes a named, managed client in your tailnet.
That gives predictable addressing and makes it simple to grant or revoke login rights.
Can Tailscale replace SSH keys and port forwards?
Yes. Use Tailscale SSH to avoid shared keys or exposed SSH ports. Sessions are authenticated to user identities and can be logged.
Audit trails reduce guesswork and speed incident response.
What advanced controls should I enable?
- ACLs: manage JSON rules via GitOps so changes are reviewed and reversible.
- Subnet routers: reach VLANs or devices that cannot run the client; verify routes before broad enablement.
- Exit nodes & NextDNS: route internet traffic through an exit node for encryption and add NextDNS filtering for ad/malware blocking.
“Point-to-point mesh connectivity reliably traverses NATs without fragile port forwarding.”
| Feature | Benefit | Notes |
|---|---|---|
| Tailnet (WireGuard) | Encrypted, peer-to-peer links | Good for PCs, VMs, Pis, and servers |
| Tailscale SSH | No shared keys; auditable logins | Integrates with identity provider |
| Subnet Router / Exit Node | Reach non-client segments; encrypt internet egress | Test routes & limit scope |
| ACLs + GitOps | Reviewable, reversible policy | Group services by tag; scope roles |
Stream logs and flow data to your SIEM to monitor sessions and config changes over time. Share single nodes with family or collaborators when needed, not whole segments.
DNS, DHCP, and name resolution that support segmentation
Centralize DNS with ad/tracker filtering, define per‑VLAN DHCP scopes, and use static reservations for key services so names and IP addresses stay predictable.
Make name resolution a predictable, auditable part of your design so services remain reachable and logs stay meaningful.
How do I centralize DNS and block trackers?
Run a local resolver (on your NAS or a small VM) that supports blocklists. Point clients to it via DHCP so ads and trackers are filtered by default. Use split‑horizon DNS to publish internal names without exposing them to the internet.
How should DHCP be scoped per VLAN?
Define explicit DHCP ranges, gateways, and DNS per VLAN. Use static reservations for critical services—NAS, hypervisor, and controllers—to stabilize logs and firewall rules over time.
What controls should I enforce across segments?
Allow only needed DNS queries across segments. Block external resolvers from IoT and Guest to enforce policy. Enable mDNS/IGMP helpers only where discovery is required.
Operational rules: document your address plan, limit who can change DHCP/DNS, and audit users access periodically. For implementation details, see the guide on configuring DHCP and DNS.
“Predictable names and reserved addresses reduce incident investigation time.”
Wi‑Fi design: SSIDs per role and client isolation
Create separate SSIDs per role (Default, IoT, Guest, Secure). Map each SSID to a VLAN so policy follows devices automatically. Prefer wired PoE backhaul for stable performance; use mesh only when cabling isn’t feasible.
Design Wi‑Fi with purpose: assign SSIDs by role so policy follows devices automatically.
How should a guest captive portal behave?
Enable a captive portal for Guest with short sessions (24‑hour expiry) and require acceptance or credentials for internet access. Turn on client isolation so one guest client cannot see another.
Block access from Guest to Default and Homelab VLANs. Log portal authentications and rotate guest PSKs periodically to remove stale devices.
When should I choose wired backhaul vs mesh?
Use wired PoE backhaul where possible for capacity and predictable latency. Mesh is a last resort if running cable isn’t practical.
Right‑size AP models: U6 Pro/Long Range suits most home layouts. Pick U7 only when you can feed 2.5G uplinks and your internet access justifies it.
- Map SSIDs to VLANs: automatic policy and simpler troubleshooting.
- Dedicated IoT SSID: corral untrusted things and restrict access to Default.
- Survey RF over time: adjust channels and transmit power as client load changes.
| AP Model | Best for | Backhaul |
|---|---|---|
| U6 Pro / Long Range | Most homes, good range | 1G PoE or multi‑gig uplink |
| U7 | High throughput, many clients | Requires 2.5G uplink and fast internet |
| Mesh AP | When cabling impossible | Wireless backhaul; higher latency |
Keep the Default SSID for trusted family devices and admins to limit blast radius and simplify management.
Monitoring, logging, and auditing for early detection
Visibility buys time: centralize syslog, flow, and auth logs, stream them to a SIEM, and manage ACLs and firewall rules via GitOps so changes are reviewable and reversible. Make telemetry a daily tool, not an afterthought.
How do I aggregate logs and flows?
Collect syslog from routers, switches, APs, servers, and services into one store. Apply retention policies and tag entries by VLAN or lab segment so teams can filter quickly.
How do I link identity and config changes to activity?
Stream Tailscale and controller audit logs to your SIEM to correlate who changed what with who talked where. Capture flow records to baseline normal traffic over time.
How should I manage rules and change control?
Keep firewall rules and ACLs in Git. Require peer review and CI checks before merges. Record post-deployment notes and keep runbooks for common incidents like “IoT device beaconing out.”
- Alert on failed logins, new external destinations, and out-of-window rule changes.
- Test the log pipeline after updates; missing telemetry is invisible until you need it.
| Source | Data type | Retention |
|---|---|---|
| Routers & switches | Syslog, flow | 90 days |
| APs & servers | Auth, system logs | 60 days |
| Tailscale / controllers | Config audit, flow | 180 days |
Treat documentation as a living post‑deployment artifact that speeds triage and reduces mean time to repair.
Step-by-step build checklist for a secure home lab network
Work in clear phases: rack and wire, baseline the router/firewall and VLANs, deploy Proxmox and NAS, enable controlled remote access, then back up and document. This way you reduce surprises and get predictable results before you trust services with real data.
How do I rack gear and baseline the router?
Rack core gear (StarTech recommended), install PDUs, and label patch cables and network devices. Use slim Cat‑6 for tidy runs and reserve uplinks for core switches.
Set the router/firewall management IPs, create the RFC1918 IP group, and add an Allow established/related rule so return flows work as intended.
How do I create VLANs, SSIDs, and core firewall policies?
Define VLANs: Default, IoT, Guest, Secure, Homelab and map SSIDs to the right tag. Verify DHCP ranges and DNS per segment.
Add focused rules: one explicit rule per use case (DNS, Hue, management). Avoid any/any shortcuts and close unused ports.
How do I deploy Proxmox, attach NAS, and spin up services?
Deploy Proxmox, create vmbr bridges, and trunk VLANs to hosts. Build a hardened golden image and clone VMs from that template so all vms share the same baseline.
Attach the NAS via NFS for ISOs and backups while keeping latency‑sensitive VM disks local. Confirm snapshot and retention settings before production use.
How do I enable remote access and harden SSH?
Enable Tailscale on management nodes for predictable, auditable remote access. Validate paths and then lock down SSH: key‑only auth, no root, and source‑restriction to management ranges.
What should I back up and verify before going live?
Back up controller and device configs with Synology Hyper Backup. Run a test restore so you time get confidence in recovery steps.
- Verification: test Guest isolation and confirm IoT cannot reach Default except via explicit rules.
- Verification: if you run active directory, keep it isolated and test account recovery procedures.
Document every step, store configs offsite, and rehearse restores. A short checklist saves hours of troubleshooting later.
Testing, maintenance, and common pitfalls to avoid
Test every path you care about before go‑live, patch on a schedule, and avoid common traps like flat networks, over‑broad VPNs, and lingering open ports.
Before you call a build complete, run systematic tests that prove each path and policy works as intended. Build a simple connectivity matrix that lists who can talk to whom and on which ports.
Validation plan: what should you check?
- Verify DNS resolution, HTTP health checks, and ICMP where allowed.
- Test cross‑VLAN access with explicit rules rather than assumptions.
- Use real client devices and scripted probes so checks are repeatable over time.
How often should I patch?
Set a monthly cadence for firmware, OS, hypervisor, and apps. Snapshot or back up before patching so you can roll back quickly.
What common mistakes should I avoid?
- Avoid flat designs; segment early and use narrow ACLs.
- Replace broad VPNs with app‑level access and short‑lived credentials where possible.
- Close unused ports and review firewall logs after rule changes to spot noisy allows or unexpected denies.
Capture lessons from incidents, add two new pre‑deployment checks each cycle (for example, IoT egress and guest isolation), and update runbooks accordingly.
Conclusion
Keep changes small, test them clearly, and make every step reversible so outages stay short and predictable.
Keep your focus on small, verifiable changes that you can roll back fast. This gives you room to experiment while protecting day‑to‑day use and data.
You now have a blueprint to build a segmented design with strong controls, hardened hosts, and reliable backups. Prioritize identity‑aware remote access and Tailscale SSH over exposed ports to limit blast radius and ease audits.
Maintain SELinux enforcing, patch on schedule, and rehearse restores. If you run active directory or other identity services, isolate and document them so experiments do not affect family or production machines at home.
Celebrate iteration: test small, promote changes after validation, and share practical post‑mortems so the community and your setup keep improving.
FAQ
What is the first step when planning a secure homelab for network testing?
Define clear goals, scope, and risk tolerance. Decide which services you’ll run, who needs access, and whether remote internet exposure is acceptable. Start with a small, isolated environment and expand once controls are proven.
How should I segment devices and services to reduce risk?
Use VLANs to separate roles: a management VLAN, an IoT VLAN, a guest VLAN, a secure VPN/egress VLAN, and a dedicated homelab VLAN for testing. Apply firewall rules between VLANs to allow only necessary traffic and default to deny for new flows.
Which hardware is recommended for reliable segmentation and performance?
Consider enterprise-grade consumer gear like the Ubiquiti UniFi Dream Machine SE, PoE switches, and U6/U7 access points. Pair them with proper cabling, a rack or wall-mount patch panel, and a PDU to keep the environment tidy and serviceable.
How do I handle multicast and mDNS services across VLANs (e.g., AirPlay)?
Enable IGMP snooping to reduce multicast flood and use mDNS gateways or Bonjour relays for cross-VLAN name discovery when needed. Be cautious—some devices (like Sonos) may break when moved across strict VLAN boundaries.
What firewall rules should I create to enforce segmentation?
Build rules that map to use cases: allow DNS and NTP from clients to trusted servers, permit management access only from a management VLAN, and enable stateful inspection. Avoid “allow LAN to anywhere” patterns; prefer service-specific, source-and-destination-limited rules.
How do I protect SSH and management services?
Use key-based SSH authentication, disable root login, and restrict allowed source IPs or subnets. Move management ports off default values only as an obstacle, not a control. Consider using Tailscale or a jump host for remote access instead of exposing SSH to the internet.
What host hardening practices should I follow for servers and VMs?
Maintain an inventory with owners and patch dates, remove unnecessary services and packages, close unused ports, enforce least privilege for accounts, and automate configuration drift checks. Use golden images for reproducible, hardened deployments.
Which Linux controls are essential for stronger protection?
Enable a host firewall (iptables or nftables) with a zero-trust mindset, keep SELinux in enforcing mode where supported, and tune ICMP rules to allow diagnostics but block abusive traffic. Monitor logs for unusual behavior.
How can Proxmox help with secure virtualization?
Proxmox VE supports VMs and containers with bridged networking that can carry multiple VLANs (vmbr0, vmbr1). Use separate bridges per trust zone when possible, and clone golden images to speed secure provisioning while maintaining consistency.
