Have you ever trusted an on-screen prompt and later wondered if it was a scam? A phony “update” can lead to credential theft, malicious profiles, or phishing pages. This section shows why impulsive taps are risky and how to follow safer paths on an iPhone.
Legitimate iOS updates and app installs usually verify in minutes—often 5–10. If your device sits at “stuck verifying” for hours, network trouble, low storage, or a corrupted file is often to blame. Start with Settings > General > Software Update or the App Store instead of pop-ups, emails, or texts.
We promise practical steps: spot fraudulent prompts, confirm real updates, and clear verification stalls quickly and safely. The method favors official Apple routes first and flags when a computer or deeper recovery is needed.
Key Takeaways
- Ignore unsolicited prompts; use Settings > General > Software Update or the App Store.
- Verification normally takes minutes; long delays suggest network, storage, or corruption issues.
- Pop-ups, texts, and emails can hide phishing or malicious profiles—avoid them.
- Step-by-step fixes are quick: check Wi‑Fi, free space, and retry via official paths.
- Advanced recovery steps and computer-based fixes are covered later if the device is unresponsive.
Why you shouldn’t tap every “Update” prompt: future-focused risks and how verification keeps you safe
Verifying the source before you update is your first line of defense. A hasty tap on an “Update” prompt can hand attackers a foothold on your iPhone. Fake messages often pressure you with countdowns, shortened links, or requests to install profiles.
Legitimate iOS and app updates live in Settings and the App Store, not in pop-ups, emails, or texts. If a browser dialog or message demands fast action, treat the prompt as suspicious and move to Settings > General > Software Update or the App Store to check the latest iOS or app list yourself.
Common lures include “Security update required,” odd domains, urgent timers, and profile install prompts. These are designed to intercept credentials or push unwanted software. Attackers are getting better at mimicking native dialogs, so always confirm the path before touching that button.
- Process discipline: validate URL origins and avoid tapping in-browser prompts; open Settings or the App Store to confirm any claim.
- Data protection: improper steps can lead to account compromise or data loss; steady verification habits reduce repair time and risk.
“Treat every unsolicited update prompt as suspect until you verify it in official Settings or the App Store.”
How to verify iOS and app updates safely before you tap
Verify each prompt in official iPhone menus before you press a button. This habit stops most scams and reduces later issue recovery time.
Only update from official places: for an ios update, open Settings > General > Software Update. For apps, open the App Store and tap your profile to view pending items. If a web alert or text asks you to update, ignore it and check these screens yourself.
Red flags to watch for
- Shortened or mismatched links and off‑brand domains.
- Forced profile installs or unusual permission requests.
- Urgent countdowns or pressure to act immediately.
When servers may be the issue
Before troubleshooting, check Apple System Status during major releases. If services are impacted, repeated attempts often cause verifying loops and wasted time.
| Action | Where to check | Why it matters |
|---|---|---|
| Verify iOS | Settings > General > Software Update | Shows version, size, and official release notes |
| Verify app updates | App Store > Profile > Pending Updates | Confirms publisher and changelog before install |
| Check server status | Apple System Status | Identifies outages that cause update issues |
Simple fixes when your iPhone is stuck on “Verifying Update”
Most stuck verifying states clear after improving Wi‑Fi and cleaning the downloaded update file. If the phone stays responsive, you can usually resolve this without advanced tools: boost connectivity, remove a corrupt file, and try again.
Start with the network. Connect to a known, strong Wi‑Fi and avoid captive portals or crowded hotspots. Pause large downloads on the same network and disable VPNs or firewalls that could block Apple servers.

Lock and wake to nudge progress
Briefly press the Side button to lock, then wake the iPhone. A short idle can stall the verifying update process; a lock/wake can prompt the next step.
Remove and re‑download the update file
Go to Settings > General > iPhone Storage, find the iOS update, and Delete Update. This clears a corrupted update file so you can fetch a fresh copy from Software Update.
Reset Network Settings if connectivity acts up
If DNS or Wi‑Fi conflicts persist, reset Network Settings via Settings > General > Transfer or Reset iPhone > Reset. You will need to re-enter Wi‑Fi passwords afterward.
- Improve connectivity: use reliable Wi‑Fi, avoid captive portals, and check router load.
- Address storage: keep several GB free in iPhone storage to prevent stuck preparing or verification issues.
- Final check: after fixes, retry the update over Wi‑Fi and watch for the Apple logo to confirm installation has begun.
Advanced solutions: from force restart to Recovery and DFU modes
When on‑device fixes fail, use staged recovery steps that escalate from a force restart to computer restores and, as a last resort, Recovery or DFU modes. These methods can repair firmware faults or clear a device that keeps showing stuck verifying update—but they may risk data loss without a backup.
Force restart sequences for common iPhone models
force restart iphone can often clear a freeze. For iPhone 8 and later, press and release Volume Up, press and release Volume Down, then press and hold the Side until the apple logo appears.
For iPhone 7/7 Plus, press and hold Volume Down + Side until the logo shows. On iPhone 6s or earlier, press and hold Home + Side/Top until it restarts.
Use a computer to update iOS and bypass on‑device glitches
If the phone remains stuck verifying update, connect iphone computer and open itunes (Windows or older macOS) or Finder (macOS Catalina+). Select the device and choose Check for Update to reinstall iOS without erasing data when the device is recognized.
Recovery Mode and DFU: last-resort restores (data loss warning)
recovery mode lets you Restore iOS when the device is unresponsive; this erases content unless you have a backup. If Recovery fails, enter DFU mode to reload firmware at a lower level; this also causes data loss but can fix deeper corruption.
- Quick summary: A force restart often clears stalls. If that fails, update via a computer to repair without loss.
- Final note: Recovery and DFU are powerful but erase data—keep recent backups before attempting them.
Prevent update hassles: prepare your iPhone before installing the latest iOS
A few minutes of prep prevents hours of troubleshooting. Clear space, clean old update files, and align time settings before you start. Automatic Updates and accurate Date & Time keep your device aligned with Apple servers so installs finish faster and with fewer errors.
Aim to keep several GB of free storage space on your iPhone. The iOS package and temporary files need room during preparing and installation. Low space is a common cause of a stuck preparing update or stalled verifying step.
Remove stale files by going to Settings > General > iPhone Storage and choosing any old iOS installer to delete update. That clears conflicts so a fresh download completes cleanly.
Enable Automatic Updates in Settings > General > Software Update and set Date & Time to Set Automatically. These actions reduce server mismatches and make verified installs more reliable.
“Prepare your device first: free space, remove old installers, and sync time—this prevents most install issues.”
Update only over trusted Wi‑Fi and keep the phone charged or plugged in. Maintain regular encrypted backups so you can update iOS with confidence and recover without data loss if something goes wrong. For additional troubleshooting steps, see this iOS verifying update help.
| Preventive Step | Where to change it | Benefit |
|---|---|---|
| Free storage space | Settings > General > iPhone Storage | Prevents stalled preparing and installation failures |
| Delete old update file | Settings > General > iPhone Storage | Removes corrupted installers that block new downloads |
| Automatic Updates & Date & Time | Settings > General > Software Update / Date & Time | Keeps device in sync with Apple servers for smooth verification |
| Trusted Wi‑Fi & Power | Use home or workplace network; keep device charged | Avoids mid‑process interruptions and verification errors |

don’t click update simple guide verifying
Handle stalled installs with a short, ordered checklist so you can act calmly and fast. If a device shows stuck verifying, verify source, check Apple System Status, stabilize the network, then retry or move to a computer.
Follow this at-a-glance flow to resolve common verification issues without needless risk. Keep each step short and test progress before moving on.
At-a-glance flow: verify source, check servers, stabilize network, retry or connect to a computer
Quick path: verify in Settings or the App Store, check Apple System Status, switch to a strong Wi‑Fi, then retry the update. If still stuck verifying, move to a computer-based process.
- Verify source: ignore prompts and open Settings > Software Update or the App Store yourself.
- Check servers: confirm Apple System Status before chasing local issues.
- Stabilize network: use reliable Wi‑Fi, pause heavy downloads, then retry.
- Clear and retry: delete the installer in iPhone Storage and re-download; consider resetting network settings.
- If unresponsive: force restart the phone—press hold the correct sequence and release volume steps for your model.
- Last step: connect iphone computer and update via iTunes/Finder; escalate to recovery mode if needed.
When to connect your iPhone to a computer and what to expect during the update process
Switch to a computer when on‑device verifying keeps failing or the device is partly unresponsive. iTunes/Finder can refresh iOS without wiping data if the phone is detected.If your device isn’t recognized, you may need Recovery or DFU Mode, which can lead to data loss—have a backup ready.
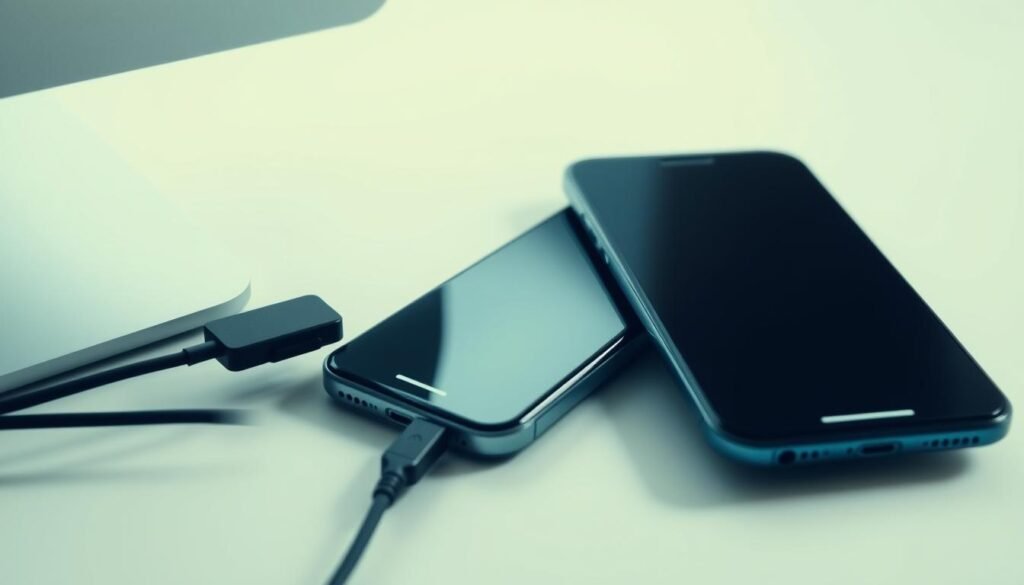
Prepare the computer path: keep iTunes or Finder current, use a known‑good cable and USB port, and trust the computer on the iPhone when prompted.
Once connected, open iTunes (Windows or older macOS) or Finder (macOS Catalina+). Select the device, then choose Check for Update to download and install the latest iOS version. This often resolves a stuck verifying update by replacing a corrupted update file with a fresh package.
If the iphone computer pair isn’t recognized, the next steps are Recovery Mode or Device Firmware Update (DFU). Those modes can repair deeper faults but may erase data, so confirm backups in Settings before proceeding.
- Use a stable network and keep power connected during the download install.
- Expect longer times during major releases; larger ios update packages take more time to verify and install.
- After completion, check Settings > General > About to confirm the ios version and test core apps for normal behavior.
Conclusion
Close the session by focusing on source checks, network stability, and the right repair path for your device. Verify from Settings or the App Store, steady Wi‑Fi, and retry before you escalate.
Keep backups and free space in iPhone Storage so an ios update can finish without data loss.
If you remain stuck verifying update, follow quick fixes: lock/wake, remove the update file, reset network settings, then restart iPhone or perform a force restart iphone using the correct volume button and Side/Home sequence until the Apple logo appears.
If on‑device steps fail, connect to a computer and update iOS via iTunes/Finder to repair the download install without data loss when possible. Recovery mode or DFU can revive a device but expect potential data loss; use them only after a recent backup.
